Setting up an online store requires the perfect blend of functionality and design. WooCommerce, the go-to WordPress plugin for eCommerce, provides all the essential tools to build an online store. But what if you want your store to not only function well but also look great and reflect your brand’s unique identity? That’s where Elementor comes in.
By combining WooCommerce’s robust eCommerce features with Elementor’s powerful page-building capabilities, you gain full control over the design of your store without needing any coding skills. From customizing your shop and product pages to optimizing your checkout process, Elementor empowers you to build a user-friendly, visually appealing, and conversion-optimized store.
This detailed guide walks you through the entire process of creating a WooCommerce store with Elementor, covering everything from installation to design and optimization, with technical tips along the way to ensure you’re following best practices.
Setting Up WooCommerce
Step 1: Install WooCommerce
Before diving into customization with Elementor, you need to have WooCommerce installed on your WordPress site. Here’s how to do it:
- Go to WordPress Dashboard: Log in to your WordPress dashboard.
- Navigate to Plugins > Add New: On the left-hand side of your dashboard, find the “Plugins” tab and click “Add New.”
- Search for WooCommerce: In the search bar, type “WooCommerce,” and once it appears, click Install Now.
- Activate WooCommerce: After installation, click the Activate button.
Once activated, WooCommerce will prompt you with a setup wizard, which guides you through the initial configurations:
- Store Setup: Enter basic store information such as location, currency, and whether you’ll be selling physical, digital products, or both.
- Payment Methods: WooCommerce offers multiple payment gateways like PayPal, Stripe, or bank transfers. Select the ones you wish to offer and set them up.
- Shipping Options: If selling physical products, you’ll need to configure your shipping zones, methods (flat rate, free shipping, etc.), and rates.
- Tax Settings: Set up your store’s tax settings, either manually entering tax rates or using automated tax calculation plugins like WooCommerce Tax.
Step 2: Configure WooCommerce Settings
After the initial setup, navigate to WooCommerce > Settings for more detailed configuration:
- General Settings: Adjust general settings like store address, selling locations, and enabling taxes.
- Products Settings: This section lets you fine-tune product handling. Set dimensions, enable reviews, and manage stock quantities.
- Payments: Manage your payment gateways. You can enable or disable options like credit cards, PayPal, and direct bank transfers.
- Shipping: Set up zones and methods for different regions. For example, free shipping for local areas and flat rates for other regions.
- Emails: Customize the automated emails sent to customers for order confirmations, shipping updates, and refunds.
Installing Elementor and Elementor Pro
Elementor allows you to design your WooCommerce store visually, giving you far more flexibility than just using WooCommerce’s default settings. However, for full functionality, you’ll need Elementor Pro.
Step 1: Install Elementor
- Go to Plugins > Add New: From your WordPress dashboard, click Plugins and then Add New.
- Search for Elementor: In the search bar, type “Elementor” and click Install Now.
- Activate Elementor: After installation, click the Activate button.
Step 2: Install Elementor Pro
If you’re using Elementor Pro (highly recommended for WooCommerce), you’ll need to upload the Pro plugin manually:
- Upload Elementor Pro: Go to Plugins > Add New and click Upload Plugin.
- Upload and Activate: Upload the zip file for Elementor Pro and click Install Now, then activate it.
Step 3: Integrating Elementor with WooCommerce
Once you have Elementor Pro installed and activated, it will automatically recognize WooCommerce. You’ll see WooCommerce-specific widgets appear within Elementor’s editor, such as product grids, add-to-cart buttons, and product categories. These widgets are essential for building custom WooCommerce pages without code.
Designing Your WooCommerce Pages with Elementor
Elementor allows you to fully customize your WooCommerce store’s design. You can modify product pages, checkout processes, and even the shop page itself.
a) Customizing the Shop Page
The shop page is where customers browse all available products. WooCommerce creates a default shop page, but Elementor allows you to completely redesign this page.
Step 1: Create a New Shop Page Template
- Go to Templates > Theme Builder: In the WordPress dashboard, click Templates and select Theme Builder.
- Add New Template: Click Add New, and from the dropdown, choose Shop Page. This template will override the default WooCommerce shop page.
- Select a Template: Elementor provides pre-built shop page templates you can customize, or you can start from scratch.
Step 2: Add WooCommerce Widgets
To build a shop page, Elementor provides specific WooCommerce widgets:
- Product Grid: Use the product grid widget to display your products in a grid format. You can customize how many columns and rows are displayed, control which categories appear, and apply sorting options.
- Categories Widget: Display product categories as a grid or list, making it easier for users to navigate your store.
- On Sale Products: Highlight products currently on sale to boost conversions.
Customize the layout, spacing, colors, and typography of each element to match your brand’s identity. Use Elementor’s responsive settings to ensure the design looks good on mobile devices.
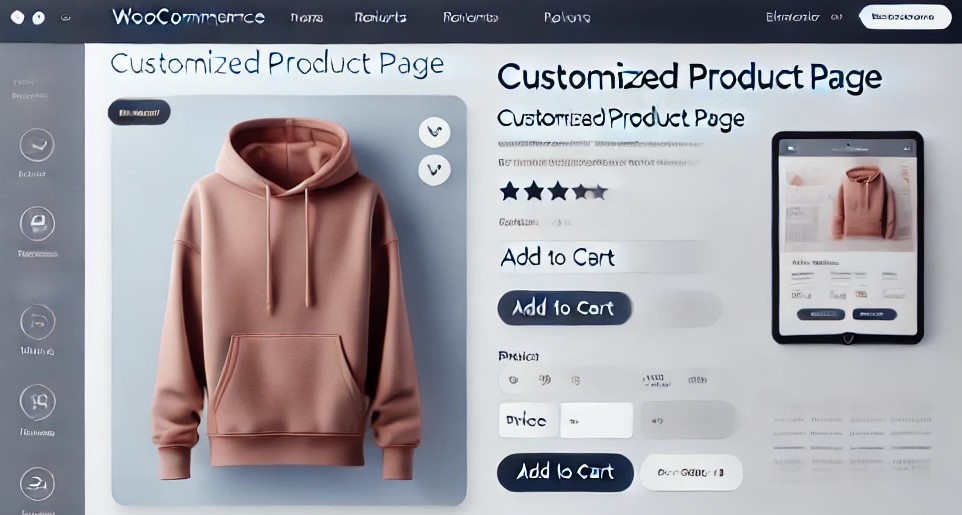
b) Customizing the Product Page
The product page is where customers view individual products and make purchasing decisions. With Elementor, you can craft product pages that suit your store’s unique needs.
Step 1: Create a Product Page Template
- Go to Templates > Theme Builder: Again, navigate to Templates > Theme Builder.
- Add New Template: Click Add New, and this time select Single Product from the dropdown. This will allow you to create a product page template.
- Select a Template: Choose from one of Elementor’s pre-built product page templates or start from a blank canvas.
Step 2: Add WooCommerce Widgets
Customize your product page with WooCommerce widgets:
- Product Title and Price: These widgets dynamically pull the product’s title and price from the WooCommerce database.
- Product Image and Gallery: Add the product image or gallery widget to display product images in a dynamic, customizable layout.
- Add to Cart Button: Customize the button’s appearance to match your brand.
- Product Description: Display the full product description with Elementor’s text editor, allowing you to style it with different fonts and colors.
- Related Products: Use this widget to show related or recommended products at the bottom of the page, increasing the chance of additional sales.
Elementor also gives you the option to drag and drop other elements, such as tabs for product specifications, customer reviews, and related products, for a fully custom layout.
Customizing the Checkout and Cart Pages
A well-optimized checkout experience can drastically reduce cart abandonment. Elementor gives you full control over the layout and functionality of the checkout process.
Step 1: Customize the Cart Page
The cart page summarizes the items in the customer’s shopping cart and allows them to proceed to checkout. Elementor’s Cart widget can be used to customize this page.
- Create a Cart Template: Go to Templates > Theme Builder and create a new template for the Cart Page.
- Customize Cart Widget: Use the Cart widget to add a summary of the products in the customer’s cart. Customize the layout, colors, and font styles to match your store’s design.
- Add Upsells or Cross-sells: You can also use Elementor to add related products or cross-sells directly to the cart page.
Step 2: Customize the Checkout Page
The checkout page is the final step in the shopping process, so ensuring it’s intuitive and easy to use is key.
- Create a Checkout Template: Go to Templates > Theme Builder and create a new template for the Checkout Page.
- Use Checkout Widgets: Use the Checkout widget to display the necessary fields for shipping, billing, and payment. Customize the layout to guide the user through the process seamlessly.
- Add Additional Custom Fields: Elementor allows you to add custom fields for things like order notes, gift wrapping options, or delivery instructions.
By reducing the steps involved and offering a clear, well-organized layout, you can streamline the checkout process and improve the user experience.
Creating a Custom Header and Footer
Custom headers and footers are important for the overall branding and navigation of your WooCommerce store.
Step 1: Design a Header
- Go to Templates > Theme Builder: Select Header from the dropdown menu to create a new header template.
- Use Nav Menu Widget: Add a navigation bar using the Nav Menu widget to allow users to navigate easily through your store.
- Add Cart and Search Icons: Incorporate an icon for the shopping cart and a search bar for better navigation. Customize the size, color, and placement to match your design.
Step 2: Design a Footer
Similarly, create a Footer template that includes:
- Social Media Links: Add links to your social profiles.
- Store Information: Include important details like operating hours, contact info, and store policies.
- Newsletter Signup: Use the Form widget to add a newsletter subscription form to encourage user engagement.
Speed and Performance Optimization
Once your WooCommerce store is fully designed, optimizing it for speed is essential. Elementor, while flexible, can sometimes add extra bloat to your site. Here’s how to mitigate that:
- Minimize Images: Ensure that your images are optimized for the web by compressing them. Use lazy loading to only load images when needed.
- Enable Caching: Use a caching plugin like WP Rocket or W3 Total Cache to improve load times.
- Minify CSS and JavaScript: Combine and minify your CSS and JavaScript files to reduce the size of your pages.
Final Thoughts
Building an online store involves more than just listing products; it’s about creating an experience that guides your customers from discovery to purchase in the most seamless way possible. By using WooCommerce and Elementor, you’re setting the stage for a highly customizable, feature-rich online store that can adapt to your business needs.
WooCommerce provides the backbone for all your eCommerce functions, handling everything from payment gateways to inventory management. But it’s Elementor that allows you to shape how customers interact with your store, giving you the power to create a design that enhances usability and reflects your brand’s personality. Whether it’s customizing your product pages, simplifying the checkout process, or adding visual flair to your store’s homepage, Elementor offers endless possibilities.
However, it’s important to keep performance in mind. A beautifully designed store is of little value if it loads slowly. Pay attention to performance optimization, especially when using page builders like Elementor. Compress images, use a solid caching plugin, and ensure CSS and JavaScript files are minified. These steps are crucial to ensure your store runs smoothly and provides an excellent user experience.
As you build your store, don’t hesitate to experiment with different designs and layouts. Elementor’s flexibility means you can always tweak things to find what works best for your audience. With a carefully designed layout, intuitive user flow, and a strong focus on performance, you’ll create an online store that’s not only visually stunning but also geared toward driving sales and growing your business.
By following the steps in this guide and combining the strengths of WooCommerce and Elementor, you’ll be well on your way to creating a successful online store that stands out in the crowded eCommerce landscape.